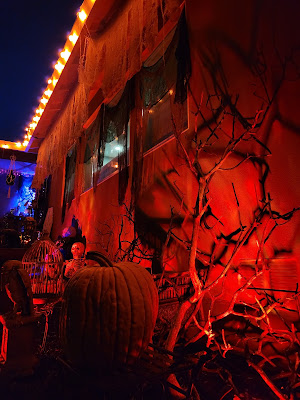
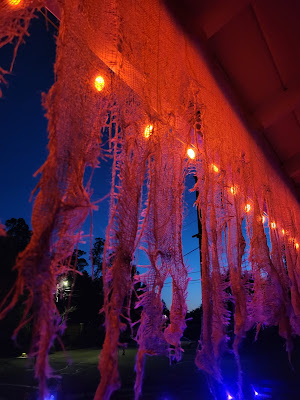
New house, new era! New era/new scare-a...get it?
We've settled into our new house which brings with it the need to rethink my entire haunt. What do I have that worked at the old house that will work here? What won't? And what new thrills can I create for all this new space? It's a blank canvas and I've got plans. Side note: today was the first day I was outside, in the driveway, working on Halloween in all it's glory. I wasn't 100% sure how the new neighborhood would receive me. Back at Little Pearl, tinkering away like this elicits delight from those in the know. No one here "knows" yet. To my delight, I had a car stop, windows rolled down and a giddy "oooooh so scary!!" "It's so beautiful!" They asked if I was an artist. Such an uncomfortable question for me. Yes...? I mean, when it comes to Halloween props, sure?
A mom pushing a stroller also stopped, big smile and lots of questions. She informed me it's a good street for Halloween; lots of kids, good trick-or-treating. She has no idea how calming that was to hear. I come in hot with Halloween. I dread that going poorly. Anyway...
First up - a scarecrow for the garden. I've been obsessed with Pumpkinrot's mind-bendingly amazing scarecrows for ages and did my take on his 2004 Scarecrow (100% credit them for my inspiration).
There's lots of great aspects to this guy but top of the list for me is that it can be dismantled into smaller pieces for storage. Instead of a 10' scarecrow peeking over the fence year round, it can be broken down - chest cavity, arms, head, base & post) and stashed away.
Supplies can be gathered from the DIY Store, Dollar Tree, the Craft Store, your backyard and your stash. I had a lot of this already around from other projects - my hoard is my go-to for troubleshooting when I have a new prop I'm working on. I don't always know *exactly* how I'm going to achieve each detail but surrounded by the detritus of my Halloween crafting, inevitably an answer emerges.
Supplies List:
Before we get started you'll need to make the base & uprights first to be able to build the rest. I made 2 uprights (tree post + pine board). I work better with my feet on the ground so one upright was shorter, around 5 feet while the other is the full 10' pole. I built the chest piece, lined up where the arms should go, draped the fabric & worked on the head all on the 5' upright. When it came time to build the "legs," I simply moved all the parts to the taller pole so that I could line it all up without pieces from one element getting in the way of another. See the very end of this entry for how to construct the base & upright.
Let's break it down, top to bottom. First up, THE HEAD...
You'll need your skull, plastic water bottle, spray paint, duct tape, burlap, jute string and string lights.
Cut the top of the bottle off and set aside, you'll need it later.
Here's the Instructables I used to make the plastic skull out of a milk jug but you could also use a store bought skull as long as it's hallow. Mine are open at the base so if yours isn't, start by cutting a hole in the bottom big enough to put your plastic bottle through.
Spray the eye sockets of your skull with the black spray paint so they'll stand out under the burlap hood.
Use duct tape on both the inside and outside of the open edge of the bottle. This beefs it up a bit making it more stable. Slide the bottle into the base of the skull. Now you have a head & neck!
Use your glue gun to secure the skull to the bottle. I like to allow the glue to drip down between the two and then flip it over so it comes back towards the seam to ensure it's really, solidly on there.
 |
| Good solid glue gun seal |
Now you could just plop this on the pointy end of your pole and be done but there's something about it hanging down at a bit of an angle that's just creepy. To achieve this, slide the head on, leaning it forward, until the point of the pole touches the bottle "neck." It tends to land right about the duct tape line, so approx 2" in. You can see the angle and where the point lands here:
 |
The point is just above the upper edge of the tape
|
Mark this spot with your finer and then cut a small hole. I used my extra sharp
Fiskers Micro Tip Pruning Shears, I use them for everything except pruning. If your pole doesn't have a sharp point you can stick a plastic thumbtack in the top to act as a pin. I plan to duct tape over the hole and cut into it again to ensure the hole doesn't grow bigger as the head moves around. Oh yeah, I should mention, the head moves in the breeze since it's not nailed down. Very fun.
Okay the lights - I hadn't initially planned on this but
Harbor Freight had an inexpensive set at the check-out and I couldn't resist. The effect is very cool so I'm pleased I went with my impulse.
 |
Easy, Peasy Lemon Squeezey LED lights
|
The coil needed to be made smaller to fit inside the bottle but once in, I could fit the whole string and the batter back in the cranium. Remember your plastic bottle top? Grab it and shove it up inside the bottle to keep the string lights from falling out. Like this:
 |
Kind of hard to see but that black bulky thing
is the battery pack and the bottle top is pointed upwards |
Cut a small piece of burlap, about 18"x18", drape it over the top of the skull and secure with the jute string. No harm in cutting the burlap on the larger side and then trimming it up to get just the right look you desire. Use the black paint to spray the eyes again.
Here it is, in all it's glowing glory...
Time for the CHEST CAVITY:
This here was my first "moment of genius while trying to meet my "must be able to dismantle" requirement. How to build a full rib cage without permanently attaching the stick -OR- having to build it then break it down each year. Solution? Over the door hooks! I found mine at the Dollar Store and apologize for not taking a picture of it first but it looked a bit like this, only black:
 |
| I wish mine had these screw holes, love the added extra security |
Now the fun begins; you'll need your door hooks, sticks, zip ties, coiled wire & raffia.
Working one stick at a time, attach them to the hooks using the zip ties (or coiled wire). I liked the zip ties because I could just snip them if I wasn't happy with the placement. I did my best to try to both hide the hooks and keep everything towards the front so that I wouldn't get hung up taking the chest cavity off the upright.
 |
Note only one branch hooks over the top, otherwise
the back is free of obstructions |
After placing a few sticks, wrap the raffia around your zip tie connection points to hide them. Raffia reminded me of decaying tendons and I could match the colors of the Manzanita whether it was still fresh orange red or already aged brown.
A drape or coat further helps cover the mechanics of the door hook. I plan to go back and wrap raffia around exposed metal and perhaps tuck Spanish Moss in for more movement and decay.
Next up, ARMS!
You'll need 2 sticks (at least) that ideally fork out at the end to create fingers & zip ties/coiled wire. With the Chest Cavity in place, line the arms up and secure them with the ties/wire. Key here is to ensure they don't interfere with the Chest Cavity while also lining up to create an illusion of one single piece.
 |
The front stick is attached to the chest pack, the back
stick attached to the 2x4 |
 |
The red stick is attached to the chest cavity. The brown
stick, the arm, is attached to the 2x4 |
Finally, LEGS:
The lower half of the body gets attached to the tree post portion of the upright, similar to how you attached the arms to the 2x4. Again, be mindful of where the Chest Cavity sticks meet up with the "legs" as well as any pieces that might stick out and get hung up on anything else. Extra long zip ties work great for this step and I used jute string instead of raffia as I needed to cover more area & make sure those sticks weren't going anywhere.
When this guy officially goes out, I'll add more to the base, attaching them to the ABS pipe so it appears to be growing out of the base.
The final touch is the cloak. Burlap would work, or creepy cloth. I had this cool piece in a bin leftover from a Halloween costume I made years ago. Lucked out it was just the right size.
BASE & UPRIGHT:
Spray paint the tub black (use grey highlights for a marbled look)
Glue the Black ABS pipe to the center base of the tub. Mix the concrete, I did it directly in the tub. Was it perfect? No. Does it do the trick? Absolutely. A 50 lb bag winds up weighing 100 lbs. If that's not enough weight, and it may not be in a windy area, use bags of sand for the rest. KEEP THE SAND IN THE BAG and just add the bag. Easier, cleaner & it's lighter to move a few bags than 200lbs of concrete tub. Let cure.
Meanwhile, age the 2x4 using my tried and true
SOS pad & Vinegar method. Use the 2" wood screws to attach the 2x4 to the tree stake - the top of the board should be approx 5'5" from the top point. Put the skull on if you want to eyeball it just to make sure you like the proportions.


